Sun SPOTs can use their radio facility to communicate with each other. The Sun SPOT library uses the Java ME Generic Connection Framework (GCF) to open a radio connection between two Sun SPOTs: a broadcast connection for transmitting to all Sun SPOTs in radio range, or a server connection to listen for requests from other Sun SPOTs. Physical Sun SPOTs and virtual Sun SPOTs use exactly the same instructions to communicate by radio. However at a lower level of the radio stack there is a difference. Physical Sun SPOTs use their physical radios to send data packets, while virtual Sun SPOTs use standard Internet sockets: regular sockets for point-to-point connections, or multicast sockets for broadcast.
Some Linux distributions (such as SuSE) do not have multicasting enabled by default. This prevents virtual-radio use by the Sun SPOT emulator. You can run the route add -net 224.0.0.0 command to enable multicast routing.
Running The Count Demo
As you did in Running the Sun SPOT Emulator, start Solarium, create a new virtual Sun SPOT, and load the emulator_demo.jar MIDlet bundle.
With the emulator demos loaded, right click on the virtual Sun SPOT to pop up the virtual Sun SPOT menu, and choose Run MIDlet > Count.
The LEDs start all red, representing 11111111 in binary. Click SW1 three times with your mouse to change them all to green, blue, and back to red. (SW1 is the rectangle on the left below the LEDs, and SW2 is the rectangle on the right.)
Click SW2 once with your mouse. This starts counting at 0. Each time you click SW2, you increment the counter by one. You could click 256 times to get the counter back up to 11111111.
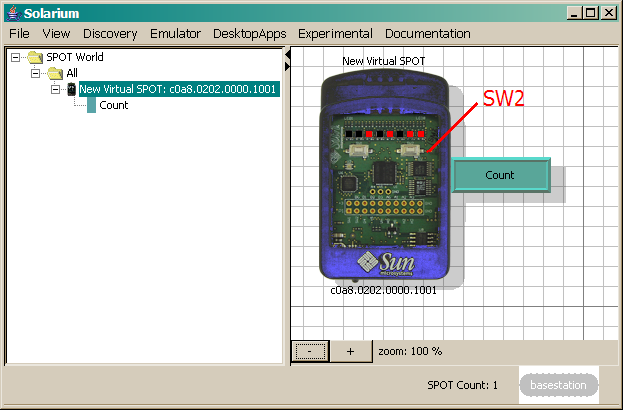
Right click on the teal Count banner of the virtual Sun SPOT and choose Exit.
Broadcasting From an Emulated Sun SPOT to Another
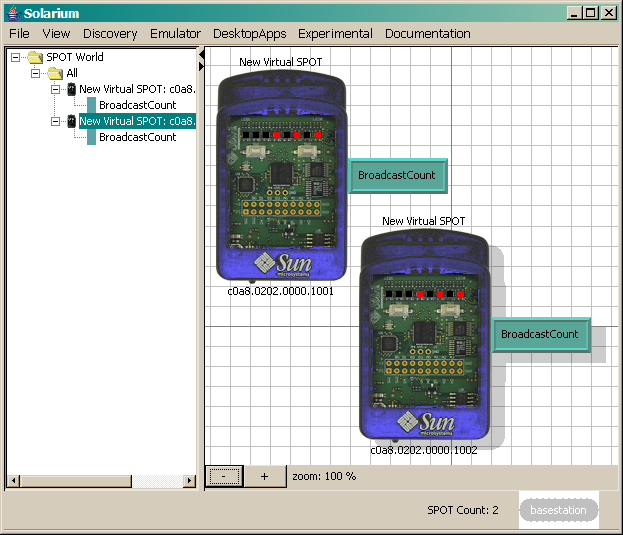
Now run the BroadcastCount demo application that has one virtual Sun SPOT controlling the LEDs of another Sun SPOT. The first thing you need is a second virtual Sun SPOT. From the Emulator menu, choose New Virtual SPOT. When it appears, load the emulator_demo.jar MIDlet bundle, as you did for the first emulated Sun SPOT.
Next start up the BroadcastCount demo. Right click on each virtual Sun SPOT, and from the pop-menu, choose Run MIDlet > BroadcastCount.
Now when you click a switch with your mouse it is the LEDs of the other virtual Sun SPOT that are changed. SW1 changes the LEDs color, while SW2 increments the count displayed. Click each switch a few times and observe the behavior of the LEDs.
Broadcasting to Multiple Emulated Sun SPOTs
Now add a third virtual Sun SPOT to make the broadcast nature of the radio transmissions even clearer. From the Solarium Emulator menu, choose New Virtual SPOT.
If the third virtual Sun SPOT appears off the screen, scroll to find it and drag it so you can see all three virtual Sun SPOTs. You might need to Zoom out or enlarge the Solarium window.
Right click on the newest virtual Sun SPOT and load the emulator_demo.jar file again. Right click again on the newest virtual Sun SPOT, and from the pop-up menu choose Run MIDlet > BroadcastCount.
Click the switches on your three virtual Sun SPOTs to verify that they each broadcast to the other two Sun SPOTs.
You could create a fourth virtual Sun SPOT if you want.
In the next part of this Tutorial, you use the BroadcastCount demo to have real Sun SPOTs interact with virtual Sun SPOTs.
« Programming with NetBeansInteracting with Physical Sun SPOTs »