|
Sun SPOT Quick Start Tutorial
The Basestation in ActionFinally, we would like to show you the Sun SPOT basestation in communication with the free-range Sun SPOTs. Basestations can be used to deploy and debug code on free-range SPOTs. To do over-the-air (OTA) communication between Sun SPOTs, you need to know the IEEE extended MAC address of the SPOTs. The IEEE extended MAC address is a 64-bit address, expressed as four sets of four-digit hexadecimal numbers: nnnn.nnnn.nnnn.nnnn. The first eight digits will always be 0014.4F01. The last eight digits should be printed on a sticker visible through the translucent plastic on the radio antenna fin. A typical sticker would say something like 0000.01AE and that would imply an IEEE address for that SPOT of 0014.4F01.0000.01AE. You can also get the IEEE address for a SPOT using an ant command explained below. We suggest you make a list with the IEEE address for each of your Sun SPOTs. Let's begin by doing an over-the-air deployment of an application to a free-range SPOT. When we finished the Air Text demo, the basestation was not attached to anything. Please attach the basestation SPOT to the USB cable on your host workstation.. We need to make sure that the basestation is acting as a basestation, that is, it is running the program that forwards communication from the host workstation to the free-range SPOTs rather than running an application program. There are at least two ways you can do this. One is to watch the activity LED on the basestation. If it gives two green flashes every 12 seconds, it is in basestation mode. You may also use an ant command to see if the SPOT is configured as a basestation. To do this,
The system will display something like this: [java] Local Monitor (purple-071010) [java] Application slot contents: [java] Startup: [java] Library suite: [java] Security: [java] Configuration properties: [java] Exiting -run-spotclient-multiple-times-locally: -run-spotclient: BUILD SUCCESSFUL Just before the section titled "Library Suite" there is a line that says "Configured as a basestation." that is your indication that the basestation SPOT is running in basestation mode. If the basestation SPOT was not in basestation mode, that section of the output would have said "Configured to run the current application". Also notice that the line above "Configured as a basestation" says "OTA Command server disabled." This is equally important. The OTA command server should be running only on the free-range SPOTs. If it is running on the basestation, the over-the-air deployments will not work. To disable the OTA command server on the basestation, use the command "ant disableota". Finally, notice that the output lists the IEEE address for the Sun SPOT in the line starting with "SPOT serial number". Ironically, running ant info stops the basestation program from running. Press the control button to reset the basestation and restart the basestation program. The basestation SPOT was shipped in a state such that it will automatically
go into basestation mode when it it plugged into an USB port. However,
if your Sun SPOT basestation is not operating in basestation mode, you
can execute the command: You should still have a command line window open with your
current directory set to
You have just reloaded the Bounce demo onto the target free-range SPOT. Troubleshooting: If the deploy fails with a timeout error and/or
a "BUILD FAILED" message, try resetting the free-range
SPOT. If another attempt fails, then most likely the free-range SPOT does
not have Over The Air (OTA) deployment enabled. To enable OTA deployment,
unplug the basestation SPOT from the USB cable, connect the free-range
SPOT to the USB cable and execute an "ant enableota"
command. Then type "ant info". The output says, among
other things, "OTA Command Server is enabled". That
indicates that you have enabled over the air deployment on that Sun SPOT.
Disconnect the free-range SPOT from the USB cable and reconnect the basestation.
Try the "ant -DremoteId=nnnn.nnnn.nnnn.nnnn deploy"
command again. It should work now. The Bounce demo is now loaded on that SPOT again. You can start the application
one of two ways. If you don't need to see the console output from the
application, you can start the application by pressing on the control
button and resetting the SPOT. If you want to see the console output from
the application, you can use the command window and execute the command:
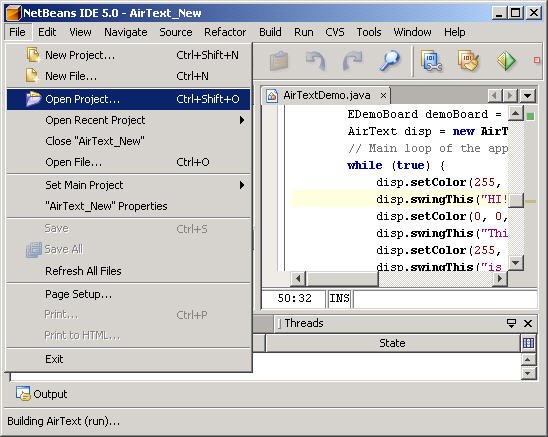
And the application will start and the output will be directed to the command window. If you start the application this way and are not interested in the output, you can Control-C to terminate the ant command. The application will continue to run on the SPOT. Please start up the Bounce demo on the SPOT in one of these ways. You should now have two free-range Sun SPOTs with the Bounce demo loaded and running on them. Now we can start the Ectoplasmic Bouncing Ball demo again, but this time we will add a simulated Sun SPOT running on the host workstation and communicating with the free-range Sun SPOTs via the basestation's radio. Select "File" from the NetBeans main menu bar and "Open Project" from the menu.
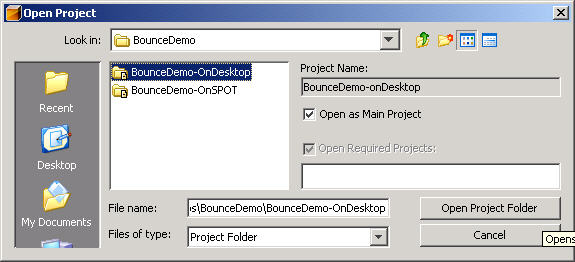
When the file selection box displays, navigate to the demo
directory in the Sun SPOT SDK directory. Within that directory, select
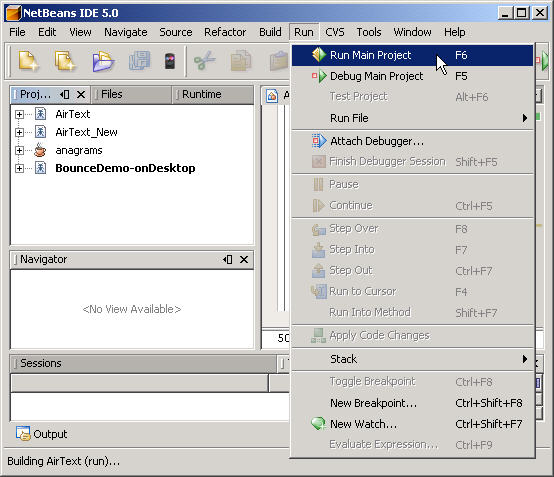
After the project has been opened, select "Run" from the menu bar and then "Run Main Project" from that menu:
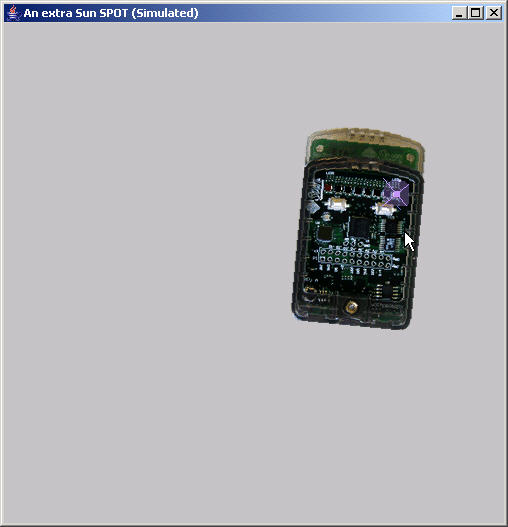
A window will open on the host workstation with the simulated Sun SPOT in it:
Grab the simulated SPOT with your workstation mouse and drag it to the left and right to tilt it. The simulation communicates with the other Sun SPOTs through the radio on the basestation Sun SPOT. Turn on or reset the free-range Sun SPOTs. See if you can get all three of the SPOTs - the two free-range SPOTs and the one simulated SPOT - all exchanging ectoplasmic balls. See if you can merge all three balls into one white ball. When you have all three balls merged into one white ball, passing back and forth between the free-range Sun SPOTs and the simulated Sun SPOT, you have completed the welcome tutorial for Sun SPOT programming. Congratulations! Undoubtedly, you now want to figure out how to implement your own application on a Sun SPOT. A good place to start is with the code for the BuiltInSensorsDemo. It is in the <SunSPOTdirectory>/Demos directory. It contains all of the Java import statements which you will need and it illustrates how to instantiate and use all of the sensors on the demo sensor board. Many of the common usage patterns are illustrated there in a form that will make it easy fpr you to cut and paste the code to your application. If you want to learn more about using the radio, look at the RadioStrength demo. You should also look in the <SunSPOTdirectory>/Demos/CodeSamples directory. This directory has a number of demonstration applications that each go into detail on a a single type of sensor or device. One of these demonstrates use of the GPIO pins - the pads available for external device I/O on the surface of the sensor board. Use of the sensors is also described, briefly, in the Sun SPOT Owner's Manual. Finally, the software environment and structure for the Sun SPOT is described in the Sun SPOT Developer's Guide. It is a crucial resource for the Sun SPOT developer. Both are in the <SunSPOTdirectory>/sdk/doc directory. |
||||||||||||||||